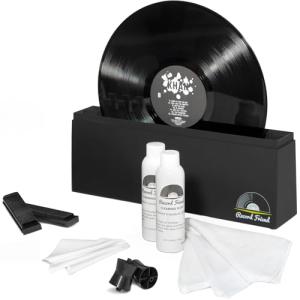
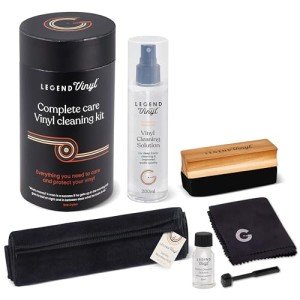
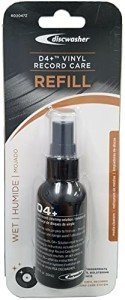
Before you jump into the fun of cleaning your vinyl records, it’s crucial to gather the right cleaning supplies. Having everything on hand makes the process smoother and ensures your precious albums get the care they deserve.
Here’s a handy list of the supplies you’ll need:
- Record Cleaning Solution: Look for a vinyl-safe cleaner. You can buy one, or make a DIY solution with distilled water and a few drops of dish soap.
- Microfiber Cloths: These are gentle and won’t scratch the surface of your records. Grab a few so you can switch them out as needed.
- Record Brush: A good brush helps remove dust and debris without damaging your vinyl. A carbon fiber brush works wonders.
- Anti-Static Sleeves: After cleaning, keep your records protected in anti-static sleeves to prevent any dust build-up.
Having these supplies will streamline your process when you clean vinyl records. It’ll save you time and help keep those grooves in the best shape possible! So, take a quick inventory, and let’s get those beautiful records shining again.
Step-by-Step Cleaning Process
Let’s jump right into it! Here’s a simple step-by-step process to clean vinyl records effectively. This way, you’ll get the best sound quality and longevity from your collection.
Step 1: Gather Your SuppliesYou’ll need a few basic items to get started:
- A soft brush (like a carbon fiber brush)
- A microfiber cloth
- A cleaning solution (you can buy a special record cleaner or make your own with distilled water and a drop of dish soap)
- A record cleaning mat or a clean, flat surface
Step 2: Dust Off the Record Before diving into a full clean, use your soft brush to remove any dust and debris from the record's surface. Hold the record by its edges and gently brush in a circular motion. This helps lift away loose particles without scratching the vinyl.
Step 3: Apply the Cleaning Solution If your record is still looking a bit grimy, it’s time for the cleaning solution. If using a spray, lightly mist the record—don’t oversaturate it. If you're using a homemade mix, apply a small amount to your microfiber cloth and gently wipe the record in a circular motion. Always work from the inside out to prevent spreading dirt into the grooves.
Step 4: Dry and Inspect After cleaning, use a dry section of your microfiber cloth to remove any moisture. Take a moment to inspect the record for any stubborn spots. If necessary, repeat the cleaning process on those areas. And just like that, you're all set to enjoy your favorite tunes with crystal-clear sound!
Best Practices for Record Care
Taking care of your vinyl records is key to keeping them sounding great and lasting a long time. Here are some best practices to keep in mind as you aim to clean vinyl records effectively.
First up, always handle your records with clean hands. Oils, dirt, and grime can transfer from your fingers to the grooves, and that’s not what you want when you’re trying to enjoy your favorite tracks. It might sound simple, but it makes a big difference!
When it comes to cleaning, a soft brush or microfiber cloth is essential. There are special brushes designed for vinyl records that can gently remove dust without scratching the surface. If your records are really dirty, consider using a vinyl record cleaning solution. Just make sure to apply it gently and follow the directions to avoid any damage.
Storage matters, too! Always keep your vinyl records upright and in a cool, dry place. Avoid stacking them flat, as this can warp the vinyl over time. Investing in protective sleeves can also help shield your records from dust and scratches.
Finally, be mindful of your turntable setup. Make sure your needle is clean and in good condition, and that your turntable is level. A well-maintained turntable will help you get the most out of your vinyl collection and make your cleaning efforts even more worthwhile.
Storage Tips for Longevity
When you want to keep your vinyl in top shape, proper storage is key. It’s not just about cleaning; how you store your records can make a huge difference in their longevity. Here are some simple tips to help you clean vinyl records and ensure they last as long as possible.
First off, always keep your records upright. Storing them flat can cause warping or bending over time, which can affect sound quality. Use a sturdy shelf or crate that’s designed for records, and make sure they’re not packed too tightly together. You should be able to pull each record out without disturbing the others.
Next, think about the environment where you store your vinyl. Keep your records away from direct sunlight, as UV rays can damage both the vinyl and the artwork. Ideally, aim for a cool, dry place, away from humidity. A temperature-controlled room is best; try to maintain temperatures between 60-70°F.
Finally, consider investing in protective sleeves. When you clean vinyl records, it’s a great chance to place them in anti-static inner sleeves. This helps prevent dust from settling on your records. It’s a small step that makes a big impact on keeping them clean and safe.


